Type 1 Gauge Study
When to use this tool
A Type 1 Gauge Study is a fundamental statistical analysis performed for Measurement System Analysis (MSA). It is designed to evaluate the accuracy and precision of a measurement device (or "gauge") by measuring a single part multiple times under controlled conditions. The main purpose of a Type 1 Gauge Study is to understand the bias and variability introduced by the measurement instrument alone, independent of operator variation or part-to-part variation.
In a Type 1 Gauge Study:
- One operator measures one part using the same gauge, under consistent environmental conditions.
- The study is performed by repeating the measurement of the part multiple times (typically 50 or more repetitions) to gather enough data to assess the performance of the measurement instrument.
Using EngineRoom
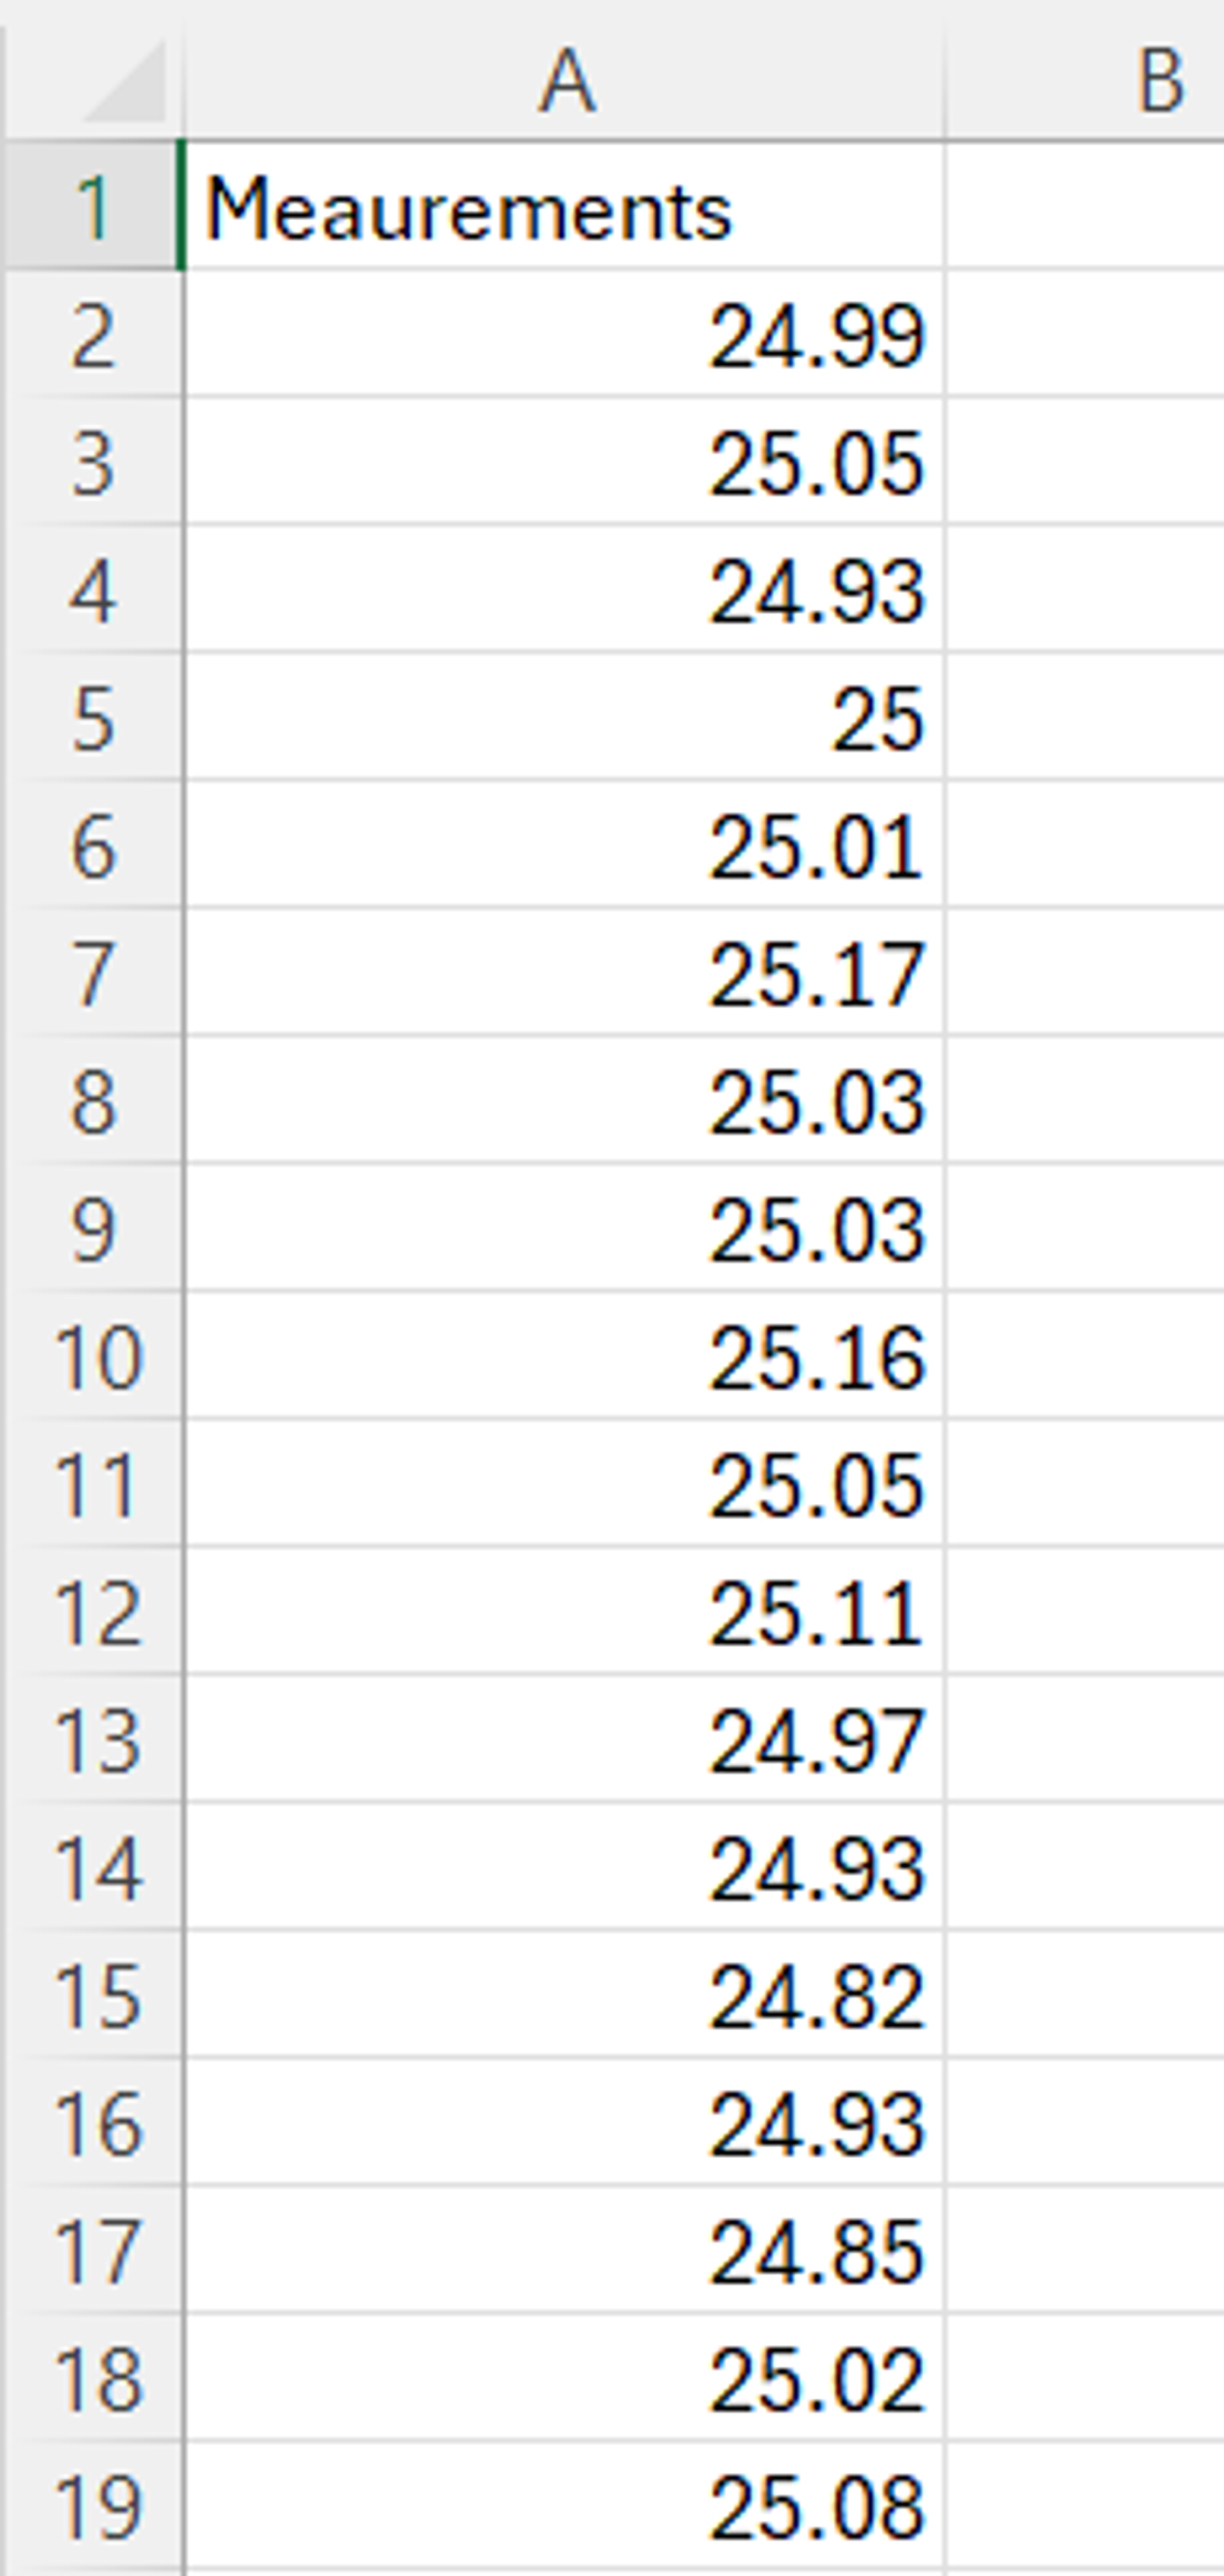
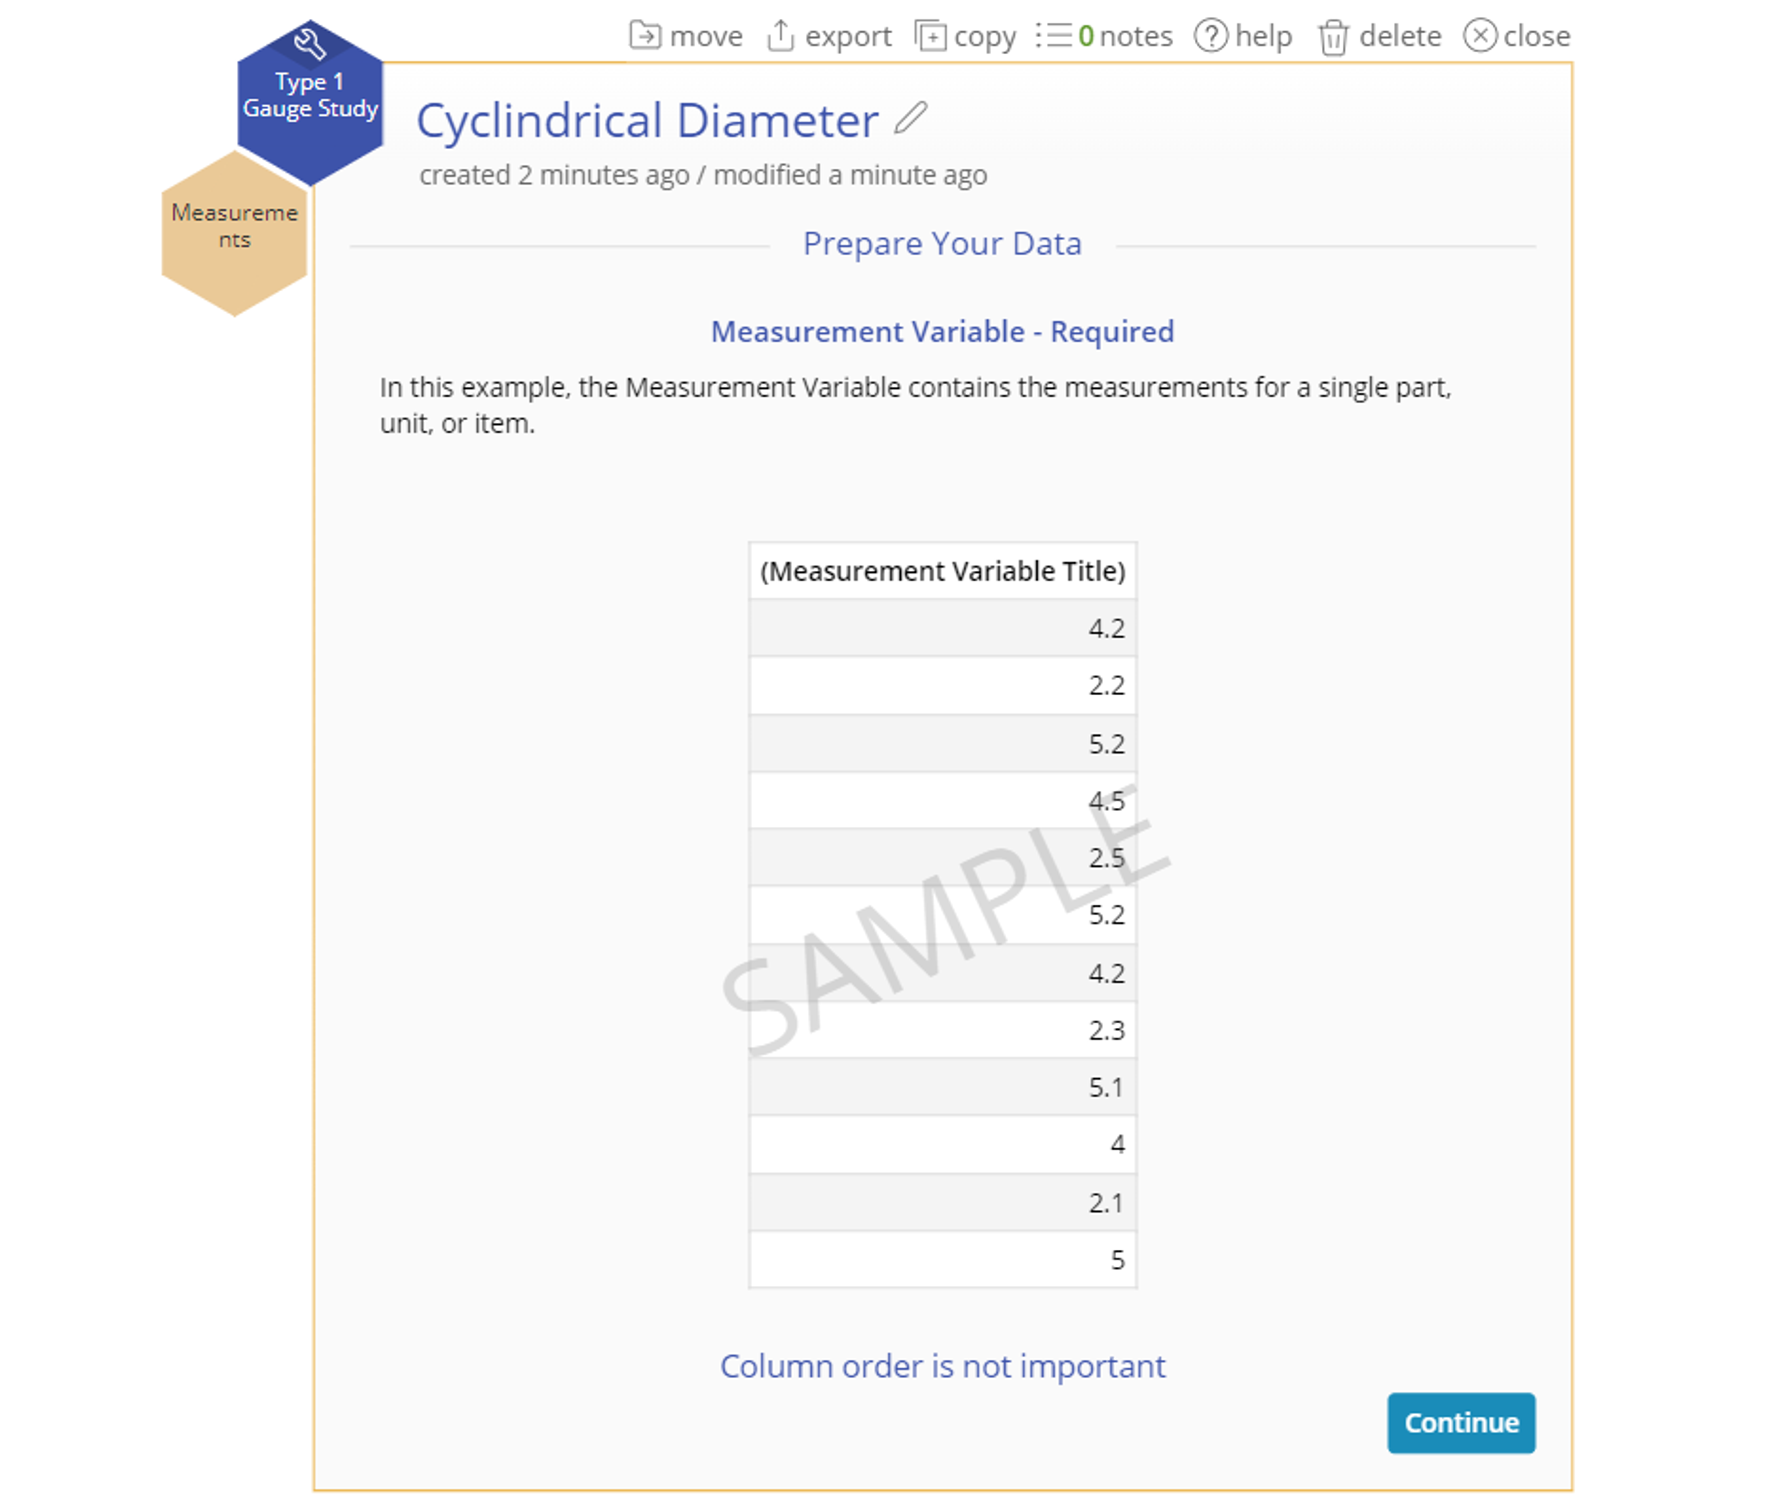
The data for a Type 1 Gauge Study looks like this:
In addition, you need :
- a Target Dimension (Reference Value),
- a Tolerance denoted by a range or by an upper and lower specification limit, or a single specification limit (note: capability is only computed when a tolerance value or both specifications are supplied)
- an optional input for Gauge Resolution (the smallest difference in measurement the gauge can detect)
In the DMAIC menu, select Measure > Measurement System Analysis (MSA)... > Type 1 Gauge Study. (In the Standard menu, select the tool under Quality Tools). The study opens on the workspace.
There is one hexagon or 'drop zone' attached to the study:
- Measurement Variable (required): numeric data that represent the repeated measurements of a single part with a known reference value by one operator.
Example:
You are a quality engineer at a manufacturing company that produces precision machined components for the aerospace industry. One of the critical dimensions of a specific component is the diameter of a cylindrical part used in a high-performance fuel injection system. Given the importance of this component, it's vital to ensure that the measuring device used to inspect this feature is both accurate and repeatable.
- Target Dimension (Reference Value): 24.9 mm
- Tolerance: ±2 mm (allowable range: 22.9 mm to 26.9 mm)
- Gauge Resolution: 0.01 mm
Steps:
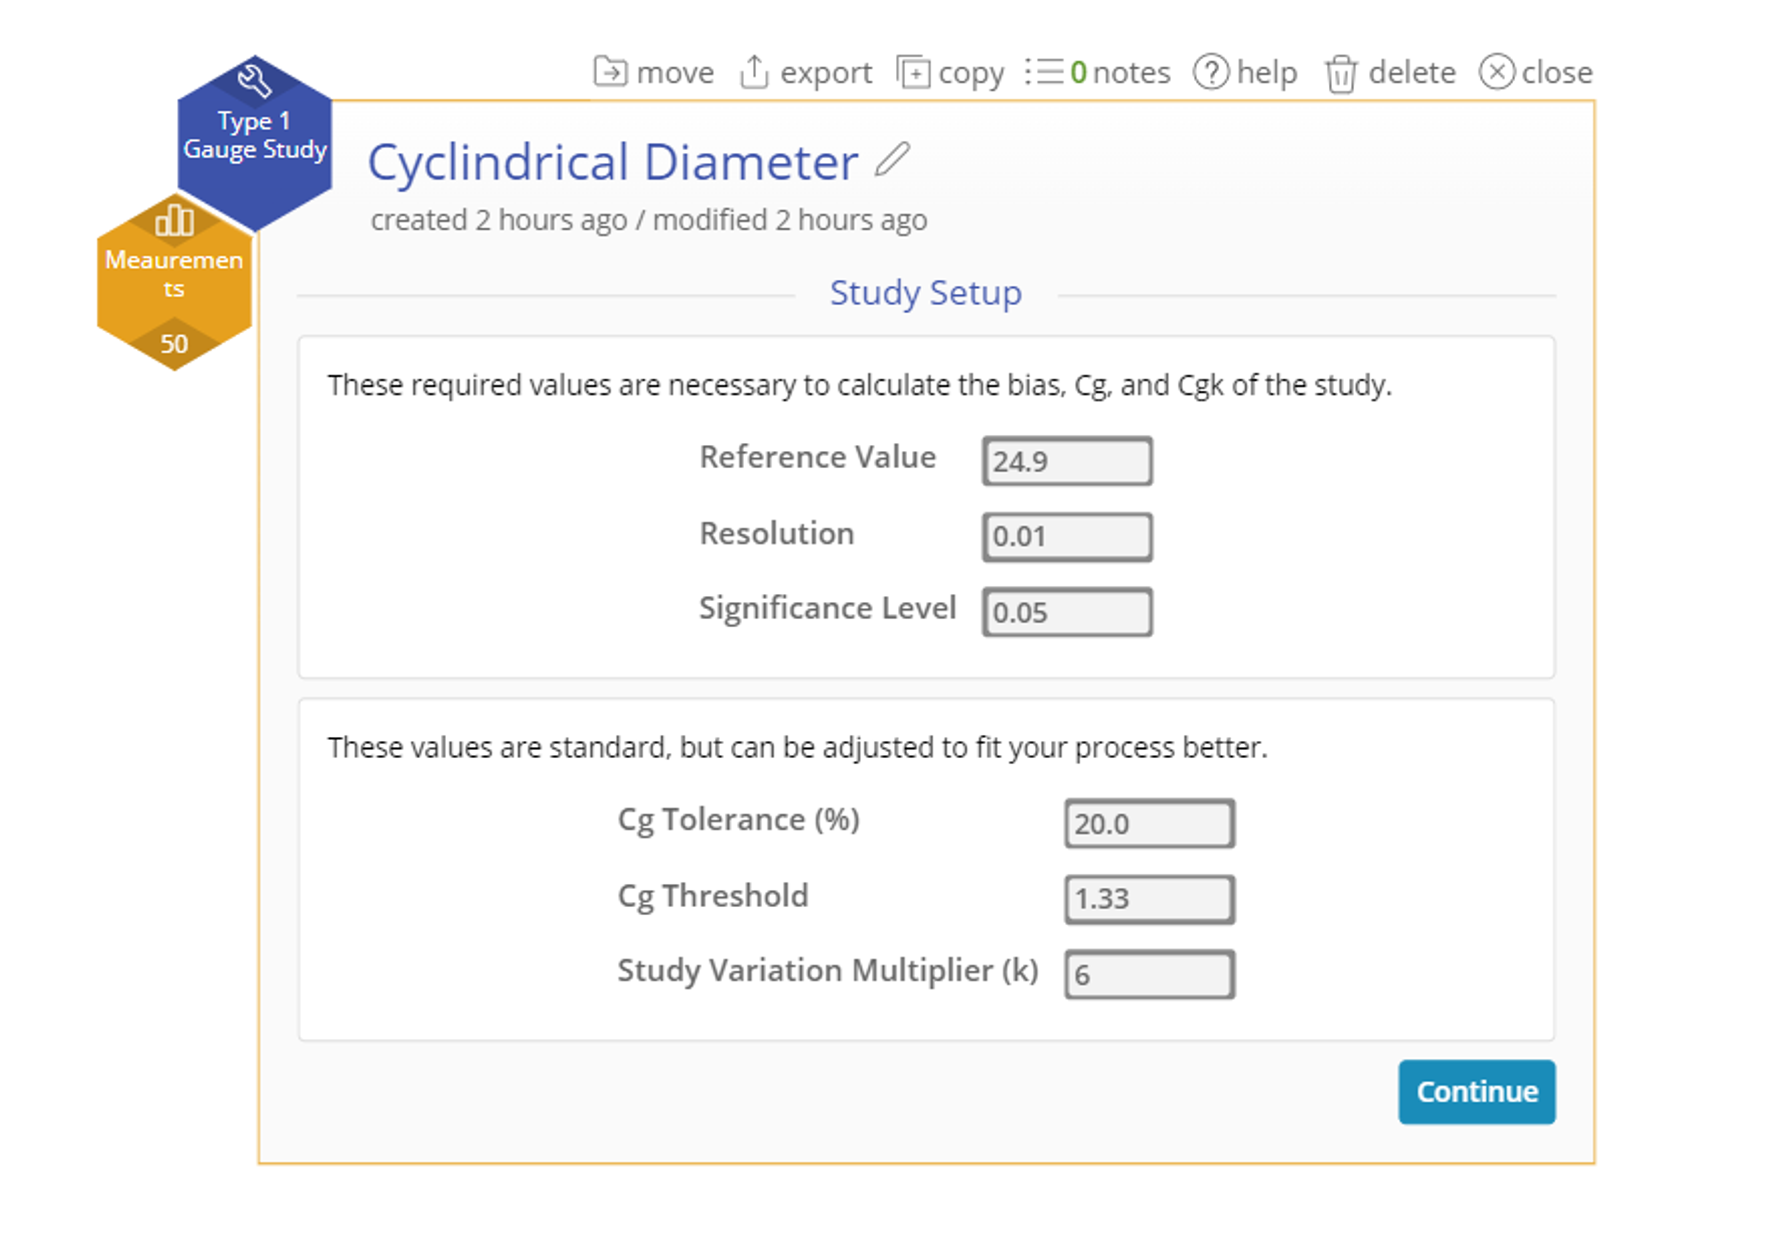
1. Go to Measure > Measurement System Analysis (MSA) in the DMAIC menu (or Quality Tools in the Standard menu) and open the Type 1 Gauge Study tool onto the workspace. Click Continue.
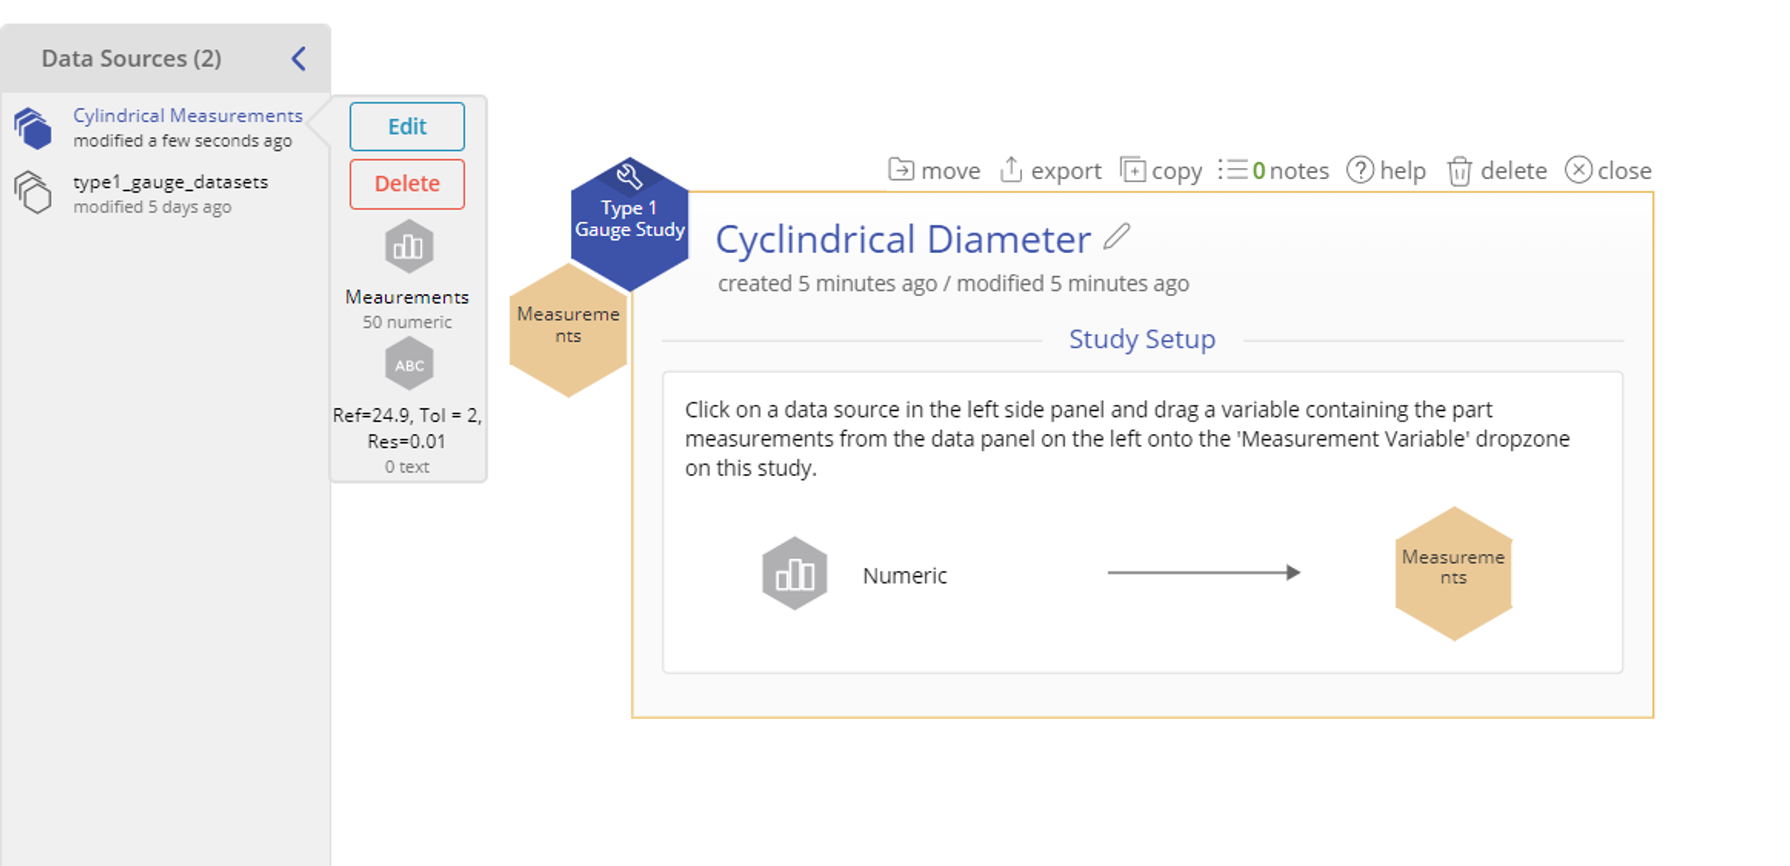
2. Upload the data source. Click on the data source and drag the drag the variable Measurement onto the Measurement Variable hexagon.
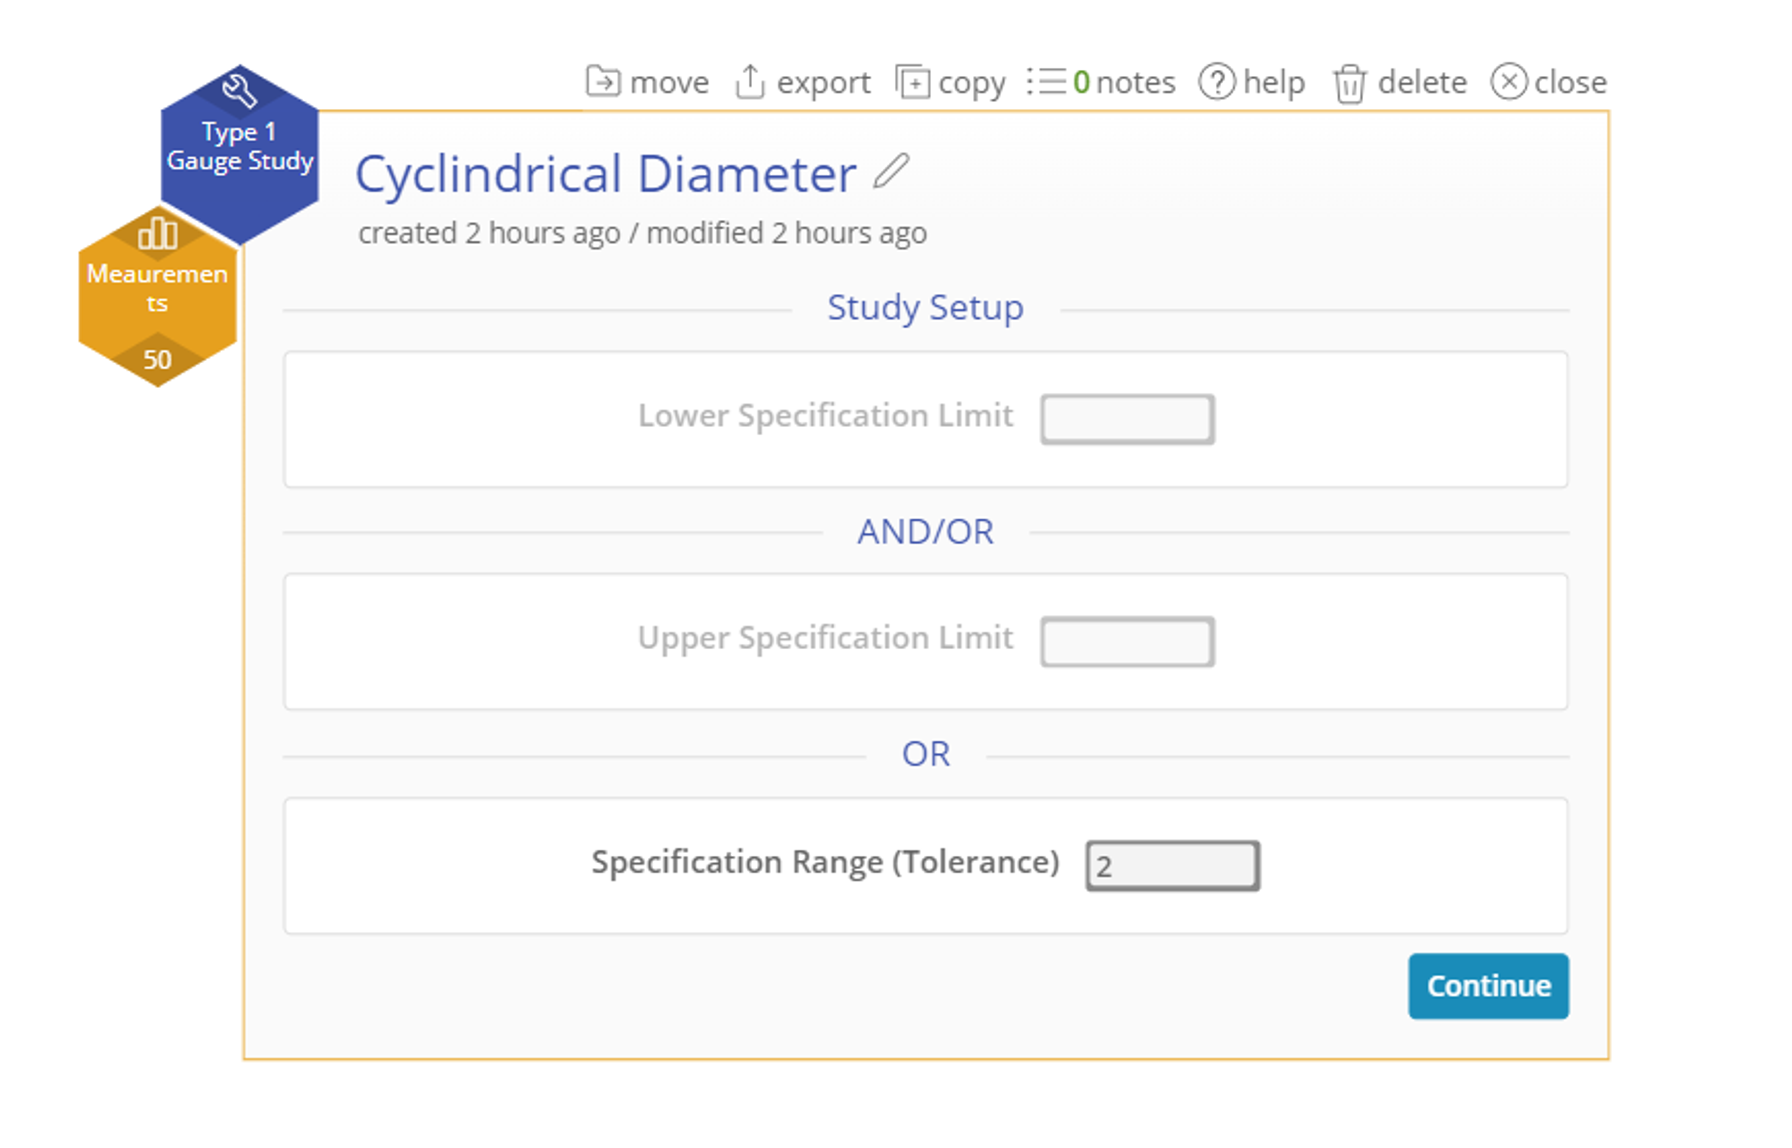
3. Enter one or both Specification Limits or the Tolerance (the difference between the two specification limits). In this case we have a Tolerance of 2 mm. Click Continue.
4. Set the other relevant parameters. In this case, we want to set the target to 24.9 and the Resolution to 0.01. We will leave the other options at their defaults. Click Continue.
5. View and analyze the results.
Results:
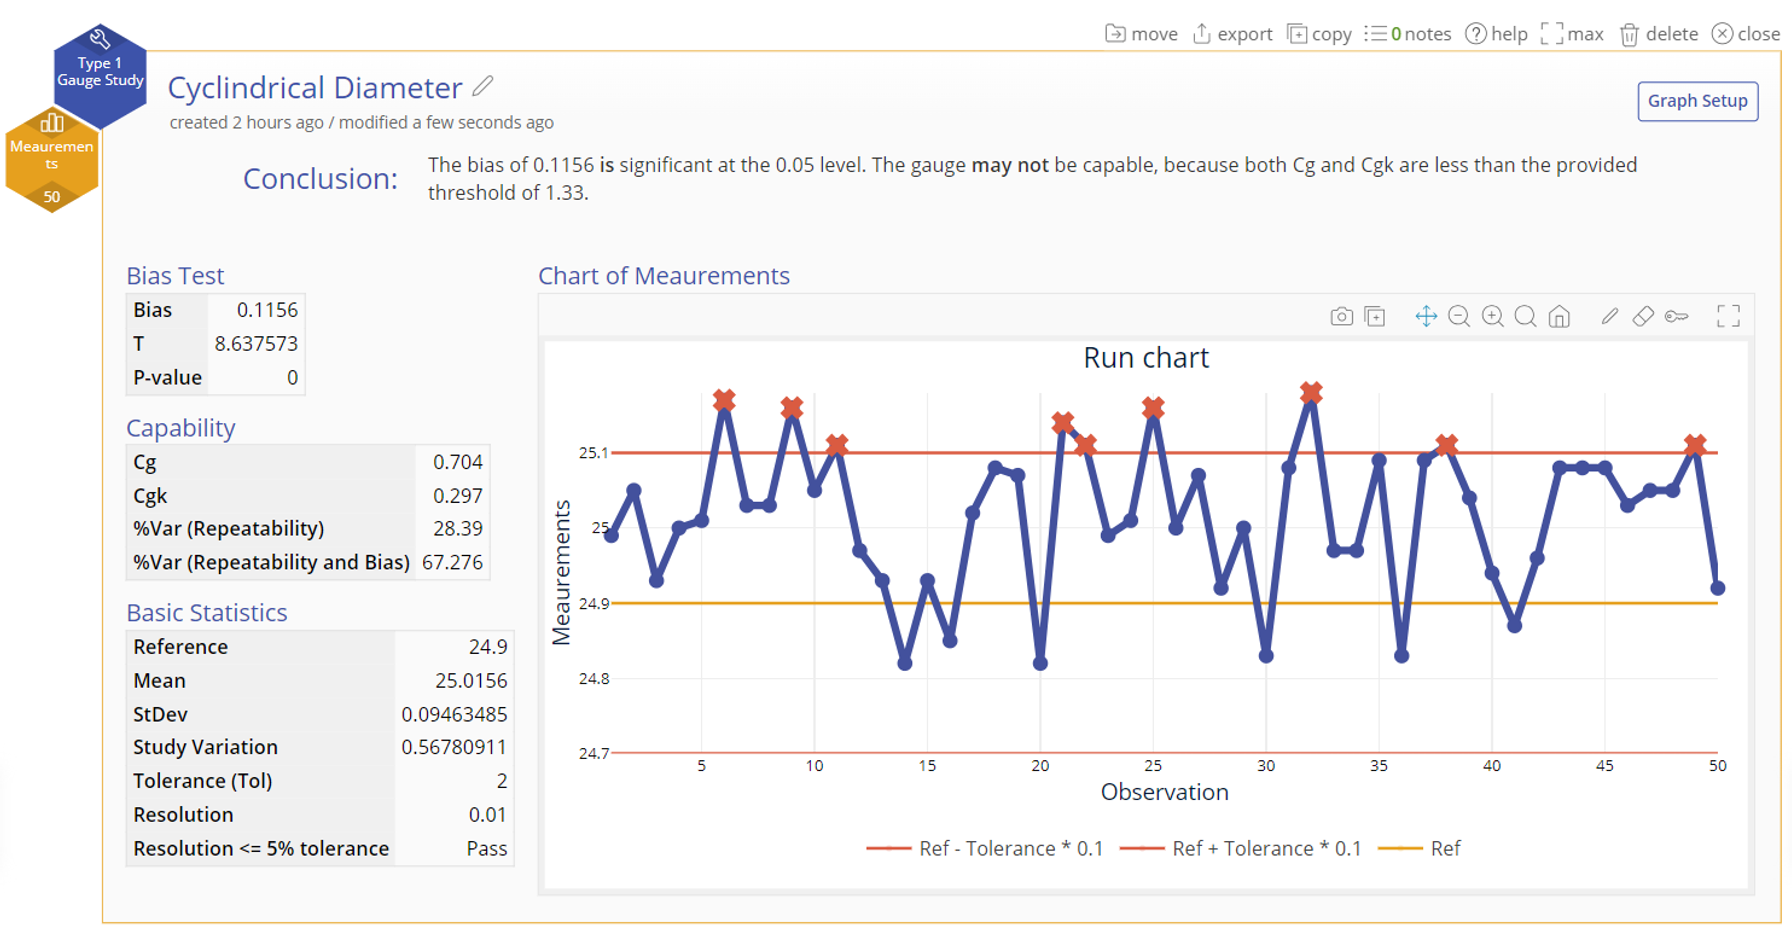
The Gauge R&R output includes graphical and numeric output:
1. The conclusion statement at the top summarizes the key findings of the analysis, indicating whether the bias is significant or not, and whether Cg and Cgk meet or exceed the desired threshold.
2. The graphical output contains a run chart with 'control limits' based on 10% of the tolerance on either side of the standard or reference value. Points that are out-of-control are flagged with a red X.
3. The numeric output contains:
- Bias Test - This is a t-test of the null hypothesis that the mean Bias = 0. A p-value smaller than the chosen significance (alpha) level rejects the null hypothesis and concludes that there is significant bias (or lack of accuracy) in the measurement instrument. If significant, the mean bias indicates how much higher (if positive) or lower (if negative) than the reference value the gauge is measuring.
- Capability - The gauge capability indices, Cg and Cgk, address the variability and centering of the measurements within the tolerance range, to determine whether the gauge is capable. The default 'acceptance' threshold is set to 1.33, but you can change the threshold depending on what is considered acceptable in your company or industry or based on the criticality of the parts being measured.
- Basic Statistics - The summary sample statistics for the data that are used to calculate the results.
Was this helpful?

